I just received a long awaited big order from Coastal Scents, including my brand spankin new 88 warm eye shadow palette, so I just had to play around! This is what I came out with this time..
Sorry for the less than preferable lighting!
Everyone loves a neutral golden look! These tones look lovely on blue or green eyes especially in my opinion, but it would definitely look great on anyone. I think I may do my first video tutorial on this look, since it's fun and easy, but it includes a lot of fun little tips and tricks. I'll also be coming out with a brow tutorial, since everyone has been asking me about my brows. Lots of fun stuff to come! Don't forget to follow to keep updated (:
Thanks so much for checking out my blog, until next time!
Dylan♥♥
Sunday, 31 July 2011
Friday, 29 July 2011
NOTD; Dark Treasure ♥♥
I didn't quite know what to do today, so I just kinda grabbed some colours and played around. This is what I came up with!
I'm falling back on my white nail art polish.. I gotta branch out more, I don't wanna get predictable! =P Here's the breakdown:
-OPI's colour So Hot it Berns (red)
-OPI's Rising Star (gold)
-Orly Instant Artist nail polishes in Jet Black and Crisp White\
-Revlon Extra Life No Chip Top Coat
Enjoy, and thanks for following and reading my blogs! (:
Dylan ♥♥
I'm falling back on my white nail art polish.. I gotta branch out more, I don't wanna get predictable! =P Here's the breakdown:
-OPI's colour So Hot it Berns (red)
-OPI's Rising Star (gold)
-Orly Instant Artist nail polishes in Jet Black and Crisp White\
-Revlon Extra Life No Chip Top Coat
Enjoy, and thanks for following and reading my blogs! (:
Dylan ♥♥
Tuesday, 26 July 2011
Back to Basics! Colour Theory: What Compliments You? ♥♥
Looking for the perfect shade that's going to set off those eyes of yours? Have a blemish that you just can't conceal, no matter how you pile on the products? Have I got the blog post for you!
Today I'm going to be talking about colour theory. I'm sure you've all seen a colour wheel before:
This little baby is useful for so many things. A colour wheel is something every artist of any medium will have engraved into the back of their mind.
The first thing a colour wheel is useful for in the cosmetics industry is selecting eye shadow colours to suit a client. For example, if you look at where blue is on the colour wheel and look at what is directly opposite, you'll see orange. Orange is blue's cross-complimentary friend. If you mix these two colours together (or any cross complimentary colours) you will make grey. However, if you place orange or an orange toned eye shadow on blue eyes, it will make them stand out and brighten like crazy.
Likewise, for green eyes, you'll see the complimentary colour is red. Now obviously most people won't use red eyeshadow, but anything with a red or warm tone to it will look gorgeous.
Of course, saying that doesn't mean everything that isn't orange toned looks bad with blue eyes. That is simply the colour that will make them stand out the most.
Another thing that colour theory is useful for is concealing. Many of you may have seen sets of colour correctors in the store, kind of like this:
I get questions about these all the time when I use them. Regarding the cross complimentary theory, the green covers blemishes and redness, the yellow counteracts purple in the skin (so under eyes and any darkness, sometimes around the nose), and the purple helps to highlight. Using these before you apply your foundation will balance out your skin tone and make your face look even more flawless.
These two examples are only the beginning of what a colour wheel can do for you. They can help you with your clothes, your hair, painting your house, buying furniture... there are no limits!
Thanks so much for reading my blog and following along with me. If you have any questions or comments please feel free to leave them in the comments or on facebook! (:
Have a fabulous, colourful day!
Dylan ♥♥
Today I'm going to be talking about colour theory. I'm sure you've all seen a colour wheel before:
This little baby is useful for so many things. A colour wheel is something every artist of any medium will have engraved into the back of their mind.
The first thing a colour wheel is useful for in the cosmetics industry is selecting eye shadow colours to suit a client. For example, if you look at where blue is on the colour wheel and look at what is directly opposite, you'll see orange. Orange is blue's cross-complimentary friend. If you mix these two colours together (or any cross complimentary colours) you will make grey. However, if you place orange or an orange toned eye shadow on blue eyes, it will make them stand out and brighten like crazy.
Likewise, for green eyes, you'll see the complimentary colour is red. Now obviously most people won't use red eyeshadow, but anything with a red or warm tone to it will look gorgeous.
Of course, saying that doesn't mean everything that isn't orange toned looks bad with blue eyes. That is simply the colour that will make them stand out the most.
Another thing that colour theory is useful for is concealing. Many of you may have seen sets of colour correctors in the store, kind of like this:
I get questions about these all the time when I use them. Regarding the cross complimentary theory, the green covers blemishes and redness, the yellow counteracts purple in the skin (so under eyes and any darkness, sometimes around the nose), and the purple helps to highlight. Using these before you apply your foundation will balance out your skin tone and make your face look even more flawless.
These two examples are only the beginning of what a colour wheel can do for you. They can help you with your clothes, your hair, painting your house, buying furniture... there are no limits!
Thanks so much for reading my blog and following along with me. If you have any questions or comments please feel free to leave them in the comments or on facebook! (:
Have a fabulous, colourful day!
Dylan ♥♥
Monday, 25 July 2011
NOTD;; Grape and Orange Crush! ♥♥
Hey everyone, sorry I disappeared for a week there, I was on vacation with no wifi! But I'm back, and equipped with my camera after a little bit of forgetfulness... let's get on with it!
Fun, right? I really wanted to try out this orange, I've had it for a while and it's my favourite colour, so I figured why not! Here's the breakdown:
-Orly Nail Lacquer in Orange Punch
-OPI Nail Polish in Pamplona Purple
-Orly Instant Artist in Crisp White
-Revlon Extra Life No Chip Top Coat
Super fun, I love the purple against the orange.
If any of you guys have requests let me know in the comments! I'll be buying a new camera that I can record good quality video on very soon, so I'll be setting up a youtube channel so I can actually do tutorials and talk to you guys! thanks so much for following and checking out my blog! Have a fabulous day, see ya real soon!
Dylan ♥♥
Fun, right? I really wanted to try out this orange, I've had it for a while and it's my favourite colour, so I figured why not! Here's the breakdown:
-Orly Nail Lacquer in Orange Punch
-OPI Nail Polish in Pamplona Purple
-Orly Instant Artist in Crisp White
-Revlon Extra Life No Chip Top Coat
Super fun, I love the purple against the orange.
If any of you guys have requests let me know in the comments! I'll be buying a new camera that I can record good quality video on very soon, so I'll be setting up a youtube channel so I can actually do tutorials and talk to you guys! thanks so much for following and checking out my blog! Have a fabulous day, see ya real soon!
Dylan ♥♥
Thursday, 14 July 2011
Nails of the Day; Frankenpolish and Arrowheads! ♥♥
I'm blogging this from a train right now, on my way to Quebec for a week of fun and fabulous times! Due to my excitement about my vacation, I did my nails blue and white for Quebec. Here's the shot!
So this freakin gorgeous dark blue colour is attribute to two different polishes.
-Base coat of Rimmel 60 seconds polish in Night Before (navy blue with a green undertone)
-Orly nail lacquer in Lunar Eclipse
-Triangles and lines done with Orly Instant Artist in Crisp White, as usual.
I love this blue!! Lunar Eclipse is definitely a great colour, but this mashup is definitely one of my new favourites.
If you have any ideas, inspirations or suggestions for nail art or a blog post, let me know in the comments! Thanks for tuning in!
Dylan ♥♥
So this freakin gorgeous dark blue colour is attribute to two different polishes.
-Base coat of Rimmel 60 seconds polish in Night Before (navy blue with a green undertone)
-Orly nail lacquer in Lunar Eclipse
-Triangles and lines done with Orly Instant Artist in Crisp White, as usual.
I love this blue!! Lunar Eclipse is definitely a great colour, but this mashup is definitely one of my new favourites.
If you have any ideas, inspirations or suggestions for nail art or a blog post, let me know in the comments! Thanks for tuning in!
Dylan ♥♥
Monday, 11 July 2011
Summer Foundation: How to Avoid a Meltdown! ♥♥
During the summer, everyone and their mothers experience problems with keeping their foundation from slipping, melting off or sweating away. I'm going to let you in on a few tips and tricks that I use in order to keep my foundation from abandoning me in a time of need!
Just to be clear, I have normal/combination skin and don't experience too many breakouts, but I sweat a lot in the summer.
Step 1: Cleanse, Tone, Moisturize
A good base is essential for a good application. Make sure to cleanse your face with a face wash that works for you. Before applying makeup, I prefer to use a face wash that isn't oil based, so as not to introduce any unneeded oils to my skin.
A lot of people don't even know toner exists. Here's a quick 101!
Basically what toners do is remove any excess debris from your skin, as well as returning a natural pH level to your skin. Naturally your skin is more on the acidic portion of the pH scale, and when you wash it with an alkaline soap it will throw off the balance. Using a toner will help to counter act that so that your skin's natural cycle won't be thrown off and it will help reduce redness and breakouts.
The toner I have recently come across that I LOVE is The Body Shop's Tea Tree Oil Toner. This toner is great because not only does the tea tree oil help to reduce redness and blemishes, but it also contains corn starch, which helps to mattify the skin.
After toning, moisturizer is essential to retain the state that you've set your skin into with your cleanser and toner. I use Aveeno Fresh Essentials Nourishing Moisturizer SPF 30. It's got a lovely scent thanks to its southernwood extract, and the SPF helps to keep my skin undamaged in the sun.
Step 2: Primer
Using a primer is going to help guarantee that your coverage is going to stay in place and go on smoothly. There are tons of primers on the market, ranging from low end (Rimmel Fix & Perfect) to higher end (Benefit That Gal Brightening Face Primer) that will boast different effects on the skin, like minimizing pores, brightening complexion, mattifying skin and smoothing out fine lines. Choose one that you feel will work best for your situation.
Step 3: Coverage
Depending on what kind of coverae you need, try to minimize the amount of products that you use. it's nice to have as little as possible on your face in the heat, but you still want that nice flawless face. Here's what I personally use, in order:
-Urban Decay Primer Potion on the eyelid and under eye
-Garnier Fructis Anti Dark Circle Under Eye Roller (for a good base and coverage)
-L'oreal True Match foundation in problem areas. If they need more coverage, I will layer this foundation to conceal more.
-Maybelline Dream Matte Powder with a powder puff to set in place.
To set the foundation and everything, I use the powder puff and roll on, not sweep, the powder everywhere I put product. After brushing away the excess powder, this gives me a little more coverage, as well as setting the foundation well in place and giving me a flawless finish.
Step 4 (Optional): Setting and Finishing Sprays
If you need that extra boost of setting power, you can buy a setting spray, such as Urban Decay's All Nighter Makeup Setting Spray. This sprayed over top of your foundation will help seal it in, as well as giving a nice sheen to your skin. Even if you just want a spray to help avoid cakeyness and a powdery look (which can happen with the powder puff technique), you can buy products like MAC Fix+ and Aveeno Thermal Spring water Spray to accomplish that. They will not help the makeup last longer, like the Urban Decay product, but they are great finishing sprays, and feel lovely in the summer, especially if you put them in the fridge!
Okay, that's everything for this totally long winded blog post! If you got this far, thanks for reading, I really appreciate it, and I hope you learned something from this! Have a fabulous, streak-free summer!
Dylan ♥♥
Thursday, 7 July 2011
Batty for Lashes: My Top 5 Mascaras! ♥♥
So I'm a bit of a mascara junkie. I find my lashes are one of the better features on my face, and I love to play them up! In this post, I'm gonna go briefly over my top 5 mascaras, what they do, how well they do it, and what my opinions are. Let's just jump right on in, shall we?
(Prices may vary from store to store)
#1- Estee Lauder Sumptuous Bold Volume Lifting Mascara
Price: $21.00
This is my Holy Grail of mascaras. I've always described it as maximum output for minimum effort. This mascara really helps to lift the eye and make you look more awake, on top of separating and volumizing every last lash you've got in stock with its extremely precise wand. No flaking, so easy to remove, and so buildable. Good job Estee Lauder, no notes for you.
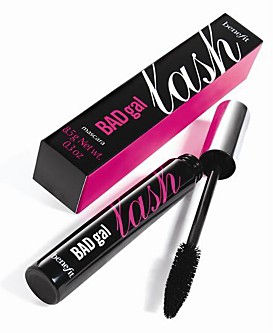
#2- Benefit BADGal Lash
Price: $19.00
Fabulous, fabulous, fabulous. This mascara is SO BLACK, and it delivers so much fullness it's crazy. My lashes look so luscious and thick with this mascara, and they get so long that they nearly hit my brows. My only beef with it is that because the brush is so huge (like, gigantic) it can be hard to get your inner and bottom lashes, and it can get difficult to avoid getting mascara on your skin.
#3- L'oreal Voluminous Million Lashes
Price: $9.00
This mascara is very true to name. Once applied, you could swear you've got a million lashes per eye. It delivers a very natural look, lots of separation and great volume, and you can build it up easily to get a much more vamped up look. I definitely prefer this over the original voluminous.
#4- Covergirl LashBlast VolumePrice: Around $8.00
Lashblast was the first mascara I ever bought, and I'll readily say that I still love it. It's a fabulous every day mascara that gives you a very voluminous finish and wakes up your eye. My only problem with this mascara is that it flakes throughout the day, which is not preferable if you're working 8 hours. I like this mascara for my off days when I'm just going out and about for errands and whatnot and I don't really need a long lasting mascara.
#5- MAC Studiofix BoldBlack LashPrice: $14.00
This mascara came out with the MAC Fashionflower collection a while back, and I msut say that for a MAC mascara (which I've never been to big on) this one is a contender. It delivers almost a spikey finish (not in a bad way though!) and is pretty easy to work with for the first coat, due to its streamlined wand. My only problem with this mascara is that if you're not careful, it can clump up fairly easily, and two coats or more begin to look very false and gets even harder to keep from clumping and the lashes sticking together.
So those are my top 5 mascaras from my collection! I hope this helps any of you readers out there figure out which mascara might be best for you, or maybe it introduced you to some new ones! If you want a more in depth review of any of the mascaras, let me know in the comments and I'll get right on it (:
Love and lashes,
Dylan ♥♥
(Prices may vary from store to store)
#1- Estee Lauder Sumptuous Bold Volume Lifting Mascara
Price: $21.00
This is my Holy Grail of mascaras. I've always described it as maximum output for minimum effort. This mascara really helps to lift the eye and make you look more awake, on top of separating and volumizing every last lash you've got in stock with its extremely precise wand. No flaking, so easy to remove, and so buildable. Good job Estee Lauder, no notes for you.
#2- Benefit BADGal Lash
Price: $19.00
Fabulous, fabulous, fabulous. This mascara is SO BLACK, and it delivers so much fullness it's crazy. My lashes look so luscious and thick with this mascara, and they get so long that they nearly hit my brows. My only beef with it is that because the brush is so huge (like, gigantic) it can be hard to get your inner and bottom lashes, and it can get difficult to avoid getting mascara on your skin.
#3- L'oreal Voluminous Million Lashes
Price: $9.00
This mascara is very true to name. Once applied, you could swear you've got a million lashes per eye. It delivers a very natural look, lots of separation and great volume, and you can build it up easily to get a much more vamped up look. I definitely prefer this over the original voluminous.
#4- Covergirl LashBlast VolumePrice: Around $8.00
Lashblast was the first mascara I ever bought, and I'll readily say that I still love it. It's a fabulous every day mascara that gives you a very voluminous finish and wakes up your eye. My only problem with this mascara is that it flakes throughout the day, which is not preferable if you're working 8 hours. I like this mascara for my off days when I'm just going out and about for errands and whatnot and I don't really need a long lasting mascara.
#5- MAC Studiofix BoldBlack LashPrice: $14.00
This mascara came out with the MAC Fashionflower collection a while back, and I msut say that for a MAC mascara (which I've never been to big on) this one is a contender. It delivers almost a spikey finish (not in a bad way though!) and is pretty easy to work with for the first coat, due to its streamlined wand. My only problem with this mascara is that if you're not careful, it can clump up fairly easily, and two coats or more begin to look very false and gets even harder to keep from clumping and the lashes sticking together.
So those are my top 5 mascaras from my collection! I hope this helps any of you readers out there figure out which mascara might be best for you, or maybe it introduced you to some new ones! If you want a more in depth review of any of the mascaras, let me know in the comments and I'll get right on it (:
Love and lashes,
Dylan ♥♥
Subscribe to:
Posts (Atom)